
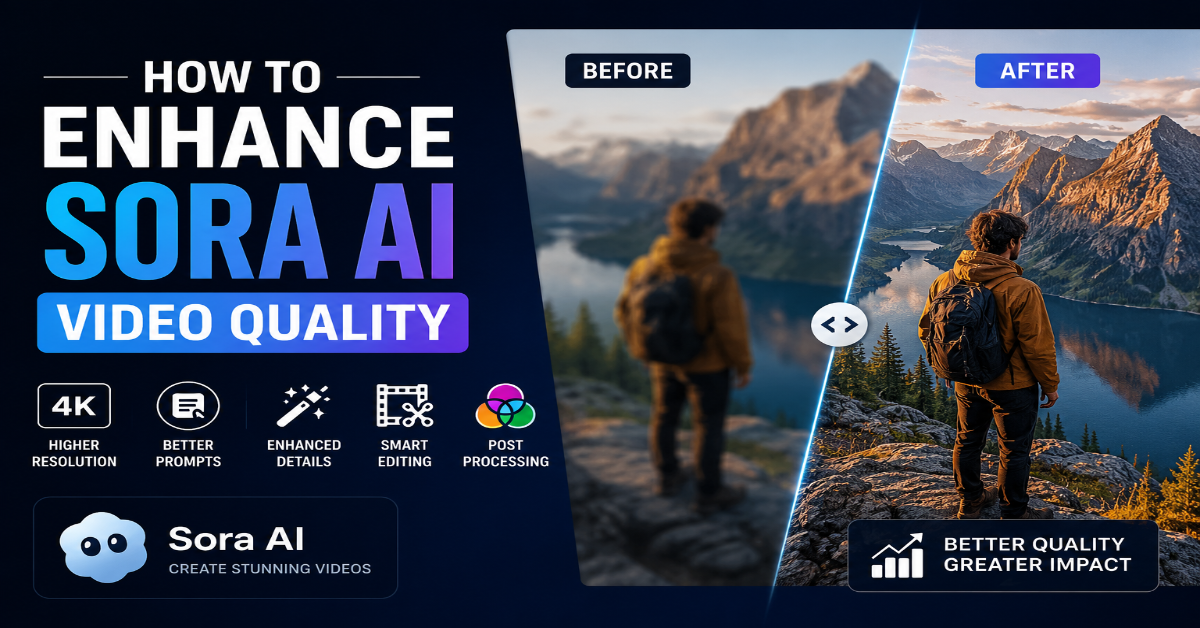
If you have ever wondered how to enhance Sora AI video quality to produce results that truly rival professional filmmaking, you are not alone. OpenAI’s Sora has rapidly emerged as one of the most powerful text-to-video AI models ever created, capable of generating visually stunning, temporally coherent videos from simple text prompts. However, like any generative AI tool, the quality of its output is heavily influenced by how you interact with it, the parameters you set, and the post-processing techniques you apply. This comprehensive guide will walk you through every step — from prompt engineering to post-production — so you can unlock the full cinematic potential of Sora AI and create videos that captivate audiences.
1. Understanding How Sora AI Generates Video
Before diving into enhancement techniques, it is essential to understand the underlying mechanism of Sora AI. Sora is a diffusion-based transformer model trained on a massive dataset of video and image data. It interprets text prompts, translates them into spatial and temporal representations, and progressively refines noise into coherent video frames.
The model excels at understanding scene composition, lighting, physics-based motion, and complex multi-character interactions. However, it can struggle with fine-grained details, extended sequences, and maintaining strict stylistic consistency across long clips — which is exactly why knowing how to enhance Sora AI video quality becomes such a valuable skill.
1.1 Key Variables That Affect Output Quality
- Prompt specificity and descriptive richness
- Resolution and aspect ratio settings
- Duration and frame rate selection
- Scene complexity and motion dynamics
- Post-generation upscaling and color correction
2. Mastering Prompt Engineering for Maximum Quality
The single most impactful way to enhance Sora AI video quality is through advanced prompt engineering. A poorly written prompt produces flat, generic footage; a highly detailed, cinematically structured prompt yields rich, professional-grade video. Think of your prompt as a director’s script — the more precise and vivid your instructions, the better Sora can execute your vision.
2.1 Use Cinematic Language in Your Prompts
Incorporate filmmaking vocabulary directly into your prompts. Sora is trained on a wide variety of professional video content, so it responds strongly to industry-standard terminology. Instead of writing “a person walking in a city,” try:
“A lone figure walks through a rain-soaked Tokyo alley at dusk, shot in a slow-motion cinematic tracking shot with anamorphic lens flare, golden hour lighting, and shallow depth of field.”
2.2 Specify Camera Movements and Angles
Explicitly defining camera movements transforms ordinary clips into dynamic sequences. Useful camera direction terms include:
- Aerial drone shot
- Low-angle push-in
- Dolly zoom
- POV shot
- Bird’s-eye view
- Handheld verité
- Orbital pan
Each of these directives guides Sora’s internal spatial reasoning and results in more visually interesting and professional output.
2.3 Define Lighting and Atmosphere Precisely
Lighting is the soul of visual storytelling. Prompt Sora with specific lighting conditions such as:
- Overcast diffused light
- Rembrandt lighting
- Neon-lit night scene
- Natural golden hour backlight
- High-contrast noir shadows
The more atmospheric context you embed into the prompt, the richer and more cohesive the final video’s visual identity becomes.
2.4 Layer Multiple Descriptors
Stack descriptors across subject, environment, action, mood, and style. A well-layered prompt might look like:
“Epic fantasy battle scene, vast medieval army marching at dawn, sweeping aerial cinematography, dramatic orchestral atmosphere, photorealistic 8K quality, cinematic color grading reminiscent of Peter Jackson’s trilogy.”
This layering gives Sora multiple quality signals to work with simultaneously.
3. Optimizing Resolution and Technical Output Settings
Understanding and correctly configuring Sora’s technical parameters is another crucial step in learning how to enhance Sora AI video quality. While Sora’s interface is relatively streamlined, the settings you select directly determine the visual fidelity of your output.
3.1 Choose the Right Aspect Ratio
Different aspect ratios serve different content types.
- 16:9 — Ideal for YouTube and general video platforms
- 21:9 — Best for cinematic storytelling
- 9:16 — Optimized for TikTok and Instagram Reels
Matching your aspect ratio to your intended platform reduces the need for post-processing crops that can degrade quality and introduce letterboxing artifacts.
3.2 Duration and Frame Rate Considerations
Longer videos with rapid scene changes are more prone to temporal inconsistencies. For the highest quality output, generate shorter, focused clips of 5–15 seconds and then assemble them in post-production.
Additionally, if your use case allows, request higher frame rates to achieve smoother motion, especially for action sequences or slow-motion effects.
3.3 Iterative Generation and Variation Exploration
Do not settle for the first output. Generate multiple variations of the same prompt and select the best-performing frames or clips.
Sora’s stochastic generation process means that each run produces slightly different results. Running three to five iterations increases your chances of getting a clip with superior composition, lighting accuracy, and motion coherence.
4. Post-Processing Techniques to Elevate Video Quality
Even the best AI-generated video benefits significantly from post-processing. After generation, use professional editing and enhancement software to push your Sora AI footage to the next level.
4.1 AI Upscaling with Topaz Video AI or DaVinci Resolve
AI upscaling is one of the most powerful tools available for enhancing Sora AI video quality after generation.
Tools like Topaz Video AI use machine learning algorithms to intelligently increase resolution while preserving and even enhancing fine detail. Running your Sora footage through a 2x or 4x upscaling pass can dramatically improve perceived sharpness, texture richness, and overall production value.
4.2 Color Grading for Cinematic Depth
Professional color grading elevates AI footage from “computer-generated” to “cinematic.”
Use DaVinci Resolve, Adobe Premiere Pro, or Final Cut Pro to apply LUTs (Look-Up Tables) that match your desired aesthetic — whether that is a warm vintage film look, a cold sci-fi palette, or a vivid commercial style.
Focus on:
- Highlights
- Shadows
- Saturation
- Skin tones
This creates a polished, consistent grade across your entire video.
4.3 Frame Interpolation for Smoother Playback
Frame interpolation tools like DAIN, RIFE, or Topaz’s motion interpolation engine can double or quadruple the frame rate of your AI-generated footage, resulting in buttery smooth playback.
This is especially impactful for:
- Slow-motion sequences
- Drone footage simulations
- Fluid camera movements
4.4 Noise Reduction and Sharpening
AI-generated video can sometimes exhibit subtle grain, compression artifacts, or softness.
Apply temporal noise reduction in DaVinci Resolve or use Neat Video’s plugin to eliminate these artifacts while preserving edge detail. Follow up with a controlled sharpening pass to restore crispness without introducing halos or over-processing artifacts.
5. Style Consistency and Scene Continuity Strategies
One of the most common challenges creators face when working with Sora AI is maintaining visual consistency across multiple generated clips. Here is how to address it strategically.
5.1 Use a Consistent Style Anchor in Every Prompt
Include a style reference or visual anchor phrase in every prompt you generate for a given project.
For example, if your project follows a cyberpunk aesthetic, include:
“Cyberpunk neon-drenched cityscape, Blade Runner 2049 visual style, volumetric fog, cool blue-magenta color palette.”
This anchor phrase helps Sora maintain a coherent aesthetic signature throughout your project.
5.2 Character and Environment Descriptions
For multi-clip narratives featuring recurring characters or settings, describe them in granular, repeatable detail across every prompt.
The more specific your descriptions — including clothing colors, physical traits, environment features, and lighting conditions — the more consistent your footage will appear when edited together.
6. Workflow Integration for Professional Creators
For content creators, filmmakers, and marketing professionals, integrating Sora AI into an efficient production workflow is the key to scaling quality output.
6.1 Pre-Production: Storyboard to Prompt Pipeline
Treat Sora prompts as a scriptwriting exercise. Develop a storyboard, then translate each panel into a detailed Sora prompt.
This systematic approach ensures narrative coherence and gives you a clear roadmap before you generate a single frame.
6.2 Hybrid AI Workflows
Combine Sora-generated footage with other AI tools.
Use Midjourney or DALL-E 3 for still concept art references, ElevenLabs for AI voiceovers, and Suno or Udio for AI-generated music beds.
Layering these tools creates a fully AI-powered production pipeline with exceptional production value at a fraction of traditional costs.
6.3 Export and Delivery Standards
Always export your final Sora-based projects in high-bitrate formats such as:
- ProRes 422
- H.265 (HEVC)
- DNxHR
Avoid over-compressing with H.264 at low bitrates, as this will undo the quality improvements gained through upscaling and color grading.
For streaming platforms, follow platform-specific delivery specifications to ensure your video is displayed at maximum quality.
Conclusion
Knowing how to enhance Sora AI video quality is what separates casual experimenters from professional-grade AI filmmakers. By combining advanced prompt engineering, strategic technical settings, powerful post-processing workflows, and smart style consistency strategies, you can transform Sora’s already impressive output into truly cinematic content.
As Sora continues to evolve and OpenAI rolls out new capabilities, the creators who invest time in mastering these enhancement techniques today will be the ones leading the next generation of AI-powered storytelling. Start implementing these strategies, experiment boldly, and watch your Sora AI videos reach new heights of quality, creativity, and impact.
Frequently Asked Questions (FAQs)
The most effective way to enhance Sora AI video quality is by combining detailed prompt engineering, optimized resolution settings, cinematic camera instructions, and professional post-processing techniques such as AI upscaling, color grading, and frame interpolation.
Yes. Prompt quality has a significant impact on the final result. Detailed prompts that include camera angles, lighting conditions, environment descriptions, and cinematic styles generally produce higher-quality and more visually appealing videos.
Use specific and descriptive language. Include details about:
Subject and action
Camera movement
Lighting style
Mood and atmosphere
Visual aesthetics
Desired video quality
The more context you provide, the better Sora can interpret your creative vision.
The ideal aspect ratio depends on your platform:
16:9 for YouTube and widescreen content
21:9 for cinematic storytelling
9:16 for TikTok, Instagram Reels, and YouTube Shorts
Choosing the correct aspect ratio reduces cropping and helps maintain video quality.
Yes. AI upscaling tools can increase resolution and enhance details after generation. Upscaling can make videos appear sharper, more professional, and better suited for larger screens or commercial projects.
Bluriness can occur due to vague prompts, complex motion sequences, low-resolution settings, or generation artifacts. Improving prompt specificity and applying sharpening or upscaling during post-production can help reduce softness.
To create cinematic videos:
Use filmmaking terminology in prompts
Specify camera movements and lens styles
Add realistic lighting descriptions
Apply cinematic color grading
Use smooth transitions and professional editing techniques
Short clips typically produce more consistent and higher-quality results. Many creators generate multiple 5–15 second clips and combine them during editing to create longer, polished videos.
Use consistent descriptions for characters, locations, lighting, and visual style. Including the same style anchor phrase in every prompt helps maintain continuity throughout a project.