
If you’re looking for Vivitar smartphone cage with timer instructions, this complete guide will walk you through everything you need to know. Whether you’re a beginner content creator, mobile filmmaker, or someone who simply wants stable and professional-looking videos, understanding how to properly use the Vivitar smartphone video cage and its built-in timer is essential. This article covers the full setup, timer usage, features, and expert tips—all explained in a simple but professional way.
Table of Contents
ToggleWhat Is the Vivitar Smartphone Cage?
To make the most of your device, it’s important to follow proper Vivitar smartphone cage with timer instructions, which cover everything from setting up your phone in the cage to mounting accessories and activating the built-in timer functions. Understanding these steps ensures that you achieve maximum stability, optimal framing, and smooth hands-free operation. The timer feature—one of the most valuable components for creators—is typically integrated into either the side or top panel of the cage, depending on the specific model. This design allows easy access and quick adjustments, enabling you to set countdown delays for photos or videos without interrupting your creative flow. With the right instructions, you can unlock the full potential of the Vivitar smartphone cage and elevate your mobile filmmaking
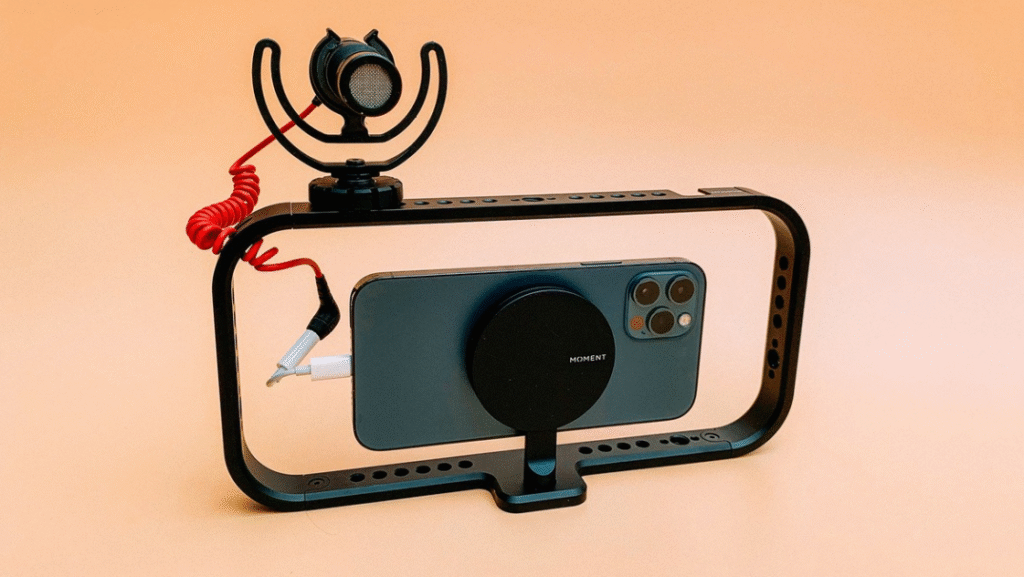
1. Components of the Vivitar Smartphone Cage
Before using the timer, understand the cage’s main parts:
- Main Smartphone Holder – clamps your phone securely
- Cold Shoe Mounts – for attaching microphones, LED lights, or monitors
- Hand Grips – ensure stable handheld shooting
- Tripod Mounts (¼-inch screw) – attach cage to tripod or gimbal
- Timer Dial / Timer Button – used to set delay for photo or video
- Shutter Button (if included) – triggers camera capture
- Flexible Frame Construction – absorbs hand shakes
Knowing these components will make the Vivitar smartphone recording cage timer instructions easier to follow.
How to Set Up the Vivitar Smartphone Cage: Step-By-Step Instructions
Step 1: Insert Your Smartphone
- Loosen the adjustable clamp.
- Place your phone in the center of the holder.
- Tighten the clamp until your phone is secure.
Tip:
Remove bulky cases for a better grip and alignment.
Step 2: Adjust the Cage Grip
Hold the cage using both handles. The ergonomic grip ensures:
- Stable walking shots
- Smooth panning
- Better control when using the timer
This is crucial for proper Vivitar smartphone video cage instructions.
Step 3: Attach Accessories
You can mount:
- Microphones
- LED lights
- Mini tripods
- Shotgun mics
- External battery packs
Cold shoe mounts and screw threads help enhance your shooting setup.
Step 4: Connect the Timer (If External Cable Included)
Some Vivitar smartphone cages come with:
- A wired shutter timer
- A simple countdown timer
- A Bluetooth shutter remote
If your model includes a wired timer, connect the cable to your smartphone’s audio jack or USB-C/lightning adapter.
If it has a Bluetooth timer, pair it through your phone’s Bluetooth settings.
Vivitar Smartphone Cage With Timer Instructions: How to Use the Timer Feature
This is the most important section for users actively searching for Vivitar smartphone cage with timer instructions, as it explains exactly how to operate the timer feature on different Vivitar models. Since each version of the cage may include a mechanical timer dial, a digital timer button, or a Bluetooth timer remote, it’s essential to follow the correct steps for your specific model. Understanding these instructions ensures accurate countdown timing, smooth hands-free recording, and properly executed photo captures. Follow the detailed steps below to set up and use the timer effectively, no matter which Vivitar smartphone cage you own.
1. Using the Manual Timer Dial
(Some models include a physical mechanical timer.)
Steps:
- Turn the timer dial clockwise to set desired delay (usually 5–60 seconds).
- Set your phone camera to photo or video mode.
- Once you press the shutter button, the dial begins counting down.
- The phone automatically captures the shot when the timer completes.
Best for:
- Group selfies
- Time-delayed video recording
- Long-exposure shots
- Hands-free cinematic scenes
2. Using the Digital Timer Button
If your Vivitar cage includes a digital timer remote, follow these steps:
Instruction Steps:
- Press the timer button once to activate timer mode.
- Use “+” or “–” buttons to choose delay (3 sec, 5 sec, 10 sec, 30 sec).
- Position your cage on a tripod or stable surface.
- Press the shutter button to start the countdown.
- Your phone will automatically start recording or capture a photo after the delay.
Uses:
- Product shots
- Vlogging intros
- Time-lapse setups
- Makeup or unboxing recordings
3. Using the Bluetooth Timer Remote
Some kits include a detachable Bluetooth remote.
Steps to Use:
- Turn on the remote.
- Pair with your smartphone (Settings → Bluetooth → Vivitar Device).
- Open your camera app.
- Press the timer button to activate delay mode (if supported).
- Press the photo/video button to trigger capture.
Useful for:
- Solo creators
- YouTubers
- TikTok/Reel creators
- Long-distance shots
Advanced Tips for Using Vivitar Smartphone Cage Timer Effectively
1. Stabilize the Cage on a Tripod
When using a timer, stability is crucial. Mount your cage on:
- A full-size tripod
- Mini tabletop tripod
- Monopod
This eliminates unwanted motion.
2. Use a Dedicated Camera App
To enhance timer performance, use:
- Filmic Pro
- Open Camera
- ProCam
- Moment Camera App
- These apps offer:
- Better timer control
- Manual exposure
- Focus lock
- Slow shutter timer modes
This improves the results of your Vivitar shutter timer cage setup.
3. Adjust Your Lighting
Good lighting ensures professional-quality results. Use:
- LED video lights
- Ring lights
- Softbox lights
Mount them directly on the cage using cold shoe slots.
4. Enable Grid Lines
This helps you frame shots more accurately, especially with delayed captures.
5. Use Rear Camera for Higher Quality
When using the timer, you don’t need to hold your phone—perfect for recording with your rear camera for the best clarity.
Common Problems and Fixes
1. Timer Not Working
- Ensure cable is fully plugged in
- Re-pair Bluetooth remote
- Restart camera app
- Switch from video to photo mode and back
2. Phone Slipping in Cage
- Tighten clamp fully
- Remove phone case
- Adjust rubber grip pads
3. Accessories Not Fitting
Use universal ¼-inch adapters or cold-shoe converters.
FAQs: Vivitar Smartphone Cage With Timer Instructions
1. What is a Vivitar smartphone cage with timer?
A Vivitar smartphone cage with timer is a mobile video rig designed to stabilize your smartphone while recording. It includes a built-in mechanical or digital timer that allows hands-free delayed recording or timed photography.
2. How do I set the timer on my Vivitar smartphone cage?
To set the timer, locate the timer dial or timer button on the cage or remote. Turn the dial to your preferred countdown time or choose the digital delay using “+” or “–” buttons. Once activated, the timer will automatically trigger the camera after the delay.
3. Why isn’t my timer working on the Vivitar smartphone cage?
Common reasons include:
- Improper cable connection
- Bluetooth remote not paired
- Camera app not supporting external timers
- Phone case blocking the shutter port
Restarting the camera app or re-pairing Bluetooth often fixes the issue.
4. Can I use third-party camera apps with the Vivitar timer?
Yes. Apps like Filmic Pro, Open Camera, and ProCam support external shutters and timer triggers. These apps can give better control over exposure and countdown delays.
5. Do I need a tripod when using the timer feature?
Although not required, using a tripod with your Vivitar smartphone cage improves stability—especially when using longer countdown timers or filming hands-free content like time-lapse or vlogs.
6. Does the Vivitar smartphone cage work with all phones?
Most Vivitar cages support phones from 2.2–3.5 inches wide, including Android and iPhone models. However, extra-thick cases may need to be removed before mounting.
7. How do I pair the Vivitar Bluetooth timer remote?
Turn on the remote, go to your phone’s Bluetooth settings, and select the Vivitar device from the list. Once paired, you can trigger photos and videos wirelessly or use the built-in timer depending on your model.
8. Can I record videos using the Vivitar timer?
Yes. The Vivitar timer works for both photos and videos, depending on the camera app you use. Some built-in camera apps only support photo timers, so third-party apps may be required.
9. Why does my phone shake after pressing the shutter button?
If you’re not using the timer properly, pressing the shutter manually can cause a slight shake. Activate the timer or Bluetooth remote to prevent movement and get smoother shots.
10. Is the Vivitar smartphone cage good for YouTube or TikTok creators?
Absolutely. The cage improves stability, provides multiple mounting points for lights and microphones, and the timer allows solo creators to film professionally without needing someone behind the camera.