If you’ve ever wondered how to add screen record on iPhone, you’re not alone. Screen recording is one of the most useful features in iOS, allowing you to capture tutorials, app demos, gameplay, or issues you want to show someone. Whether you’re using an iPhone 11, 12, 13, 14, 15, or the latest iOS version, this guide explains exactly how to enable, add, and use the screen recorder on iPhone in a simple and professional way.
In this article, you’ll learn how to turn on screen recording on iPhone, how to add it to your Control Center, how to use advanced screen recording settings, how to record with sound, and how to fix common issues.
Table of Contents
ToggleWhat Is Screen Recording on iPhone and Why You Need It
Before learning how to add screen record on iPhone, it’s important to understand what this powerful built-in feature actually does and why millions of users rely on it daily. The screen recording tool allows you to instantly capture everything happening on your iPhone screen as a high-quality video, making it incredibly useful for creating tutorials, saving online moments, recording app demonstrations, troubleshooting issues, documenting steps for others, showcasing gameplay, and producing content for platforms like YouTube, TikTok, and Instagram. Whether you’re a student, creator, gamer, or everyday iPhone user, screen recording helps you share information faster and more clearly than ever.
Screen recording lets you:
- Capture anything on your screen as a video
- Record app tutorials
- Save online content
- Show someone how to fix a problem
- Record gameplay
- Create content for YouTube, TikTok, and Instagram
- Save video call demonstrations
The built-in iPhone screen recorder works smoothly and doesn’t require any third-party app, making it safe and reliable.
How to Add Screen Record on iPhone (Quick Method)
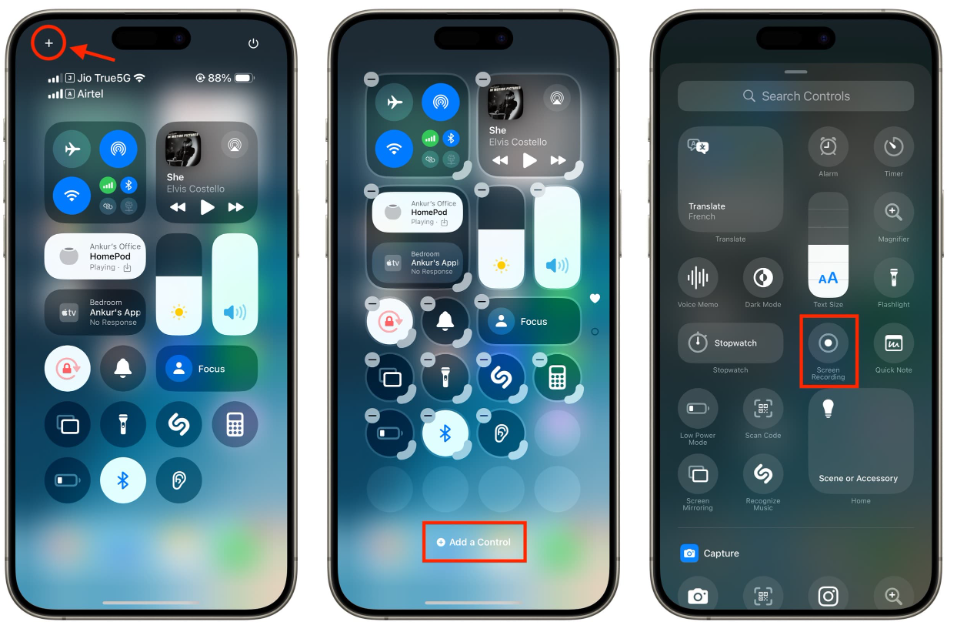
Here is the fastest and most straightforward answer for how to add screen record on iPhone. To enable this feature, simply open the Settings app, tap on Control Center, and scroll down until you find Screen Recording. Once you locate it, tap the green + (Add) button to include it in your active controls. After this quick setup, the Screen Recording icon will instantly appear in your Control Center, giving you one-tap access whenever you need to capture your screen. This is the basic method for enabling the feature, but below you’ll find a fully detailed, step-by-step 1000-word guide with additional tips, variations, and troubleshooting.
- Open Settings
- Tap Control Center
- Scroll down
- Find Screen Recording
- Tap + (Add)
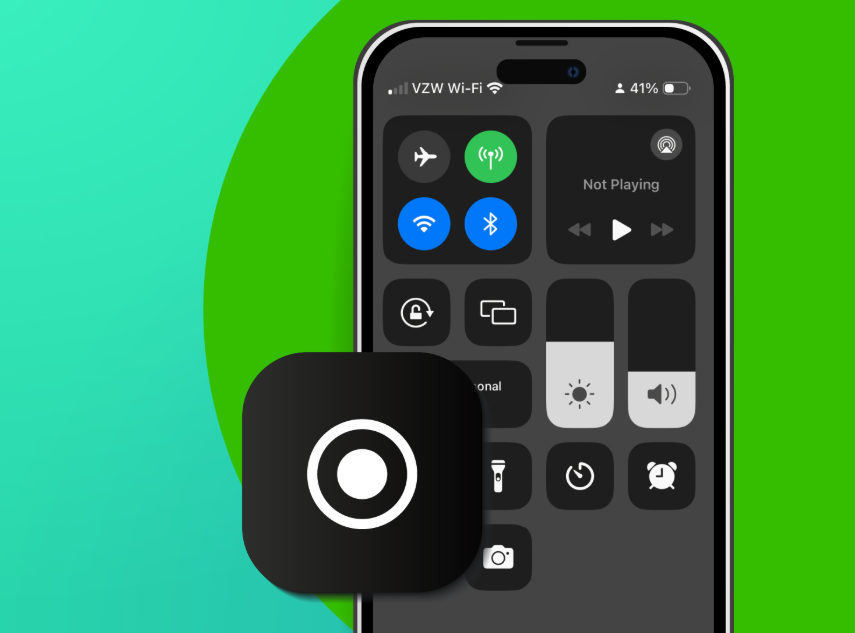
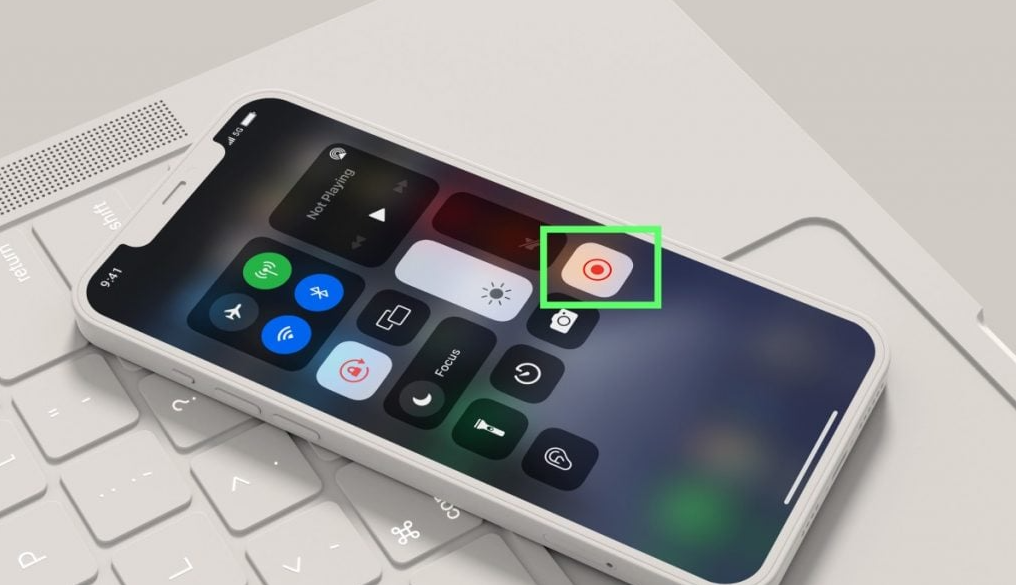
Now the Screen Recording button appears in your Control Center (the swipe-down menu).
Step-by-Step: How to Add Screen Record on iPhone to Control Center
The most important part of learning how to add screen record on iPhone is understanding how to properly enable the feature inside your Control Center, as this is where you will access it every time you want to record your screen.
Step 1: Open Settings
Navigate to your home screen and tap the Settings app.
Step 2: Tap Control Center
Scroll until you find Control Center, then tap it.
Step 3: Find “Screen Recording”
Inside the list of controls, you will see Included Controls at the top and More Controls below.
Scroll down until you find Screen Recording.
Step 4: Tap the “+” Button
Tap the green + icon next to Screen Recording.
This adds the feature instantly to your Control Center.
Step 5: Access the Screen Recorder
Swipe down from the top-right corner (iPhone with Face ID), or swipe up from the bottom (older iPhones with Home Button).
You will now see the record (●) icon.
Your screen recorder is now successfully added.
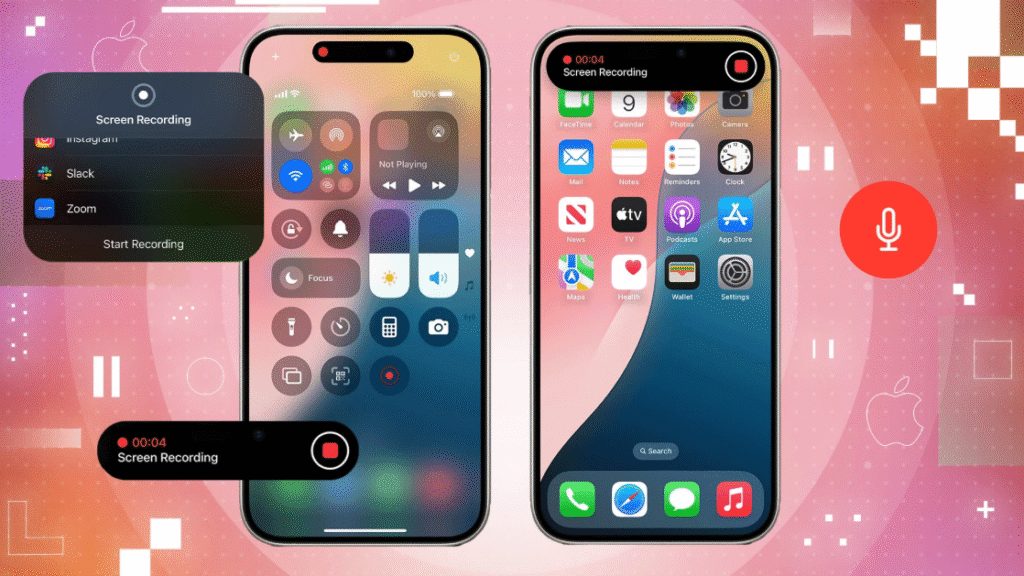
How to Start Screen Recording on iPhone
Once you’ve learned how to add screen record on iPhone, the next essential step is understanding how to actually use the feature effectively. Knowing how to start a screen recording—whether with or without sound—allows you to capture tutorials, app demonstrations, gameplay, or explanations exactly the way you want. iOS gives you flexible options to record silently or include external audio using the microphone, making the tool useful for creators, students, professionals, and everyday users alike. Below are two simple methods that show you how to start recording instantly.
Method 1: Start Recording Without Sound
- Open Control Center
- Tap the Screen Recording icon (a filled circle inside another circle)
- A 3-second countdown will appear
- Your iPhone starts recording
Method 2: Start Recording With Microphone Sound
If you want to record your voice (tutorials or explanations):
- Open Control Center
- Long-press the Screen Recording icon
- Tap the Microphone icon to turn it ON
- Tap Start Recording
This lets you record:
- Voice narration
- External audio
App sounds
How to Stop Screen Recording on iPhone
Stopping a screen recording is just as simple:
Method 1: Stop from Control Center
Swipe down → Tap the red record icon again.
Method 2: Stop from the Status Bar
If the top status bar is red:
Tap the red bar → Tap Stop.
Your video is automatically saved in Photos.
Where to Find Your Saved Screen Recording
After you’ve learned how to add screen record on iPhone and recorded a video, here’s where it goes:
- Open the Photos app
- Go to Recents or Videos
- Find your recorded file
You can now:
- Edit
- Trim
- Share
- Upload
- Add effects
Combine clips using iMovie or CapCut
How to Customize Screen Recording Settings on iPhone
iOS allows several customization options that make screen recording more powerful.
Turn On/Off Microphone
Long-press the recording button → Tap Microphone On/Off.
Choose Where to Save the Recording
You can record directly into apps like:
- Photos
- Files
- Messenger
- Instagram
- Snapchat
- TikTok
Record Internal Audio Only
Turn off the microphone but keep in-app sounds active.
Use Screen Recording for Gameplay
Gamers can record:
- PUBG Mobile
- COD Mobile
- Free Fire
- Roblox
- Fortnite
without using external apps.
How to Fix Screen Recording Not Working on iPhone
Sometimes users search why screen record is not working on iPhone. Here are solutions.
1. Check Storage
Go to Settings → General → iPhone Storage.
Free up space.
2. Check for App Restrictions
Some apps block screen recording:
- Netflix
- Apple TV
- Banking apps
These cannot be recorded due to copyright and security.
3. Restart Your iPhone
A simple restart refreshes background services.
4. Reset Control Center
Remove Screen Recording → Add again.
5. Update iOS
Settings → General → Software Update.
Advanced Tips: How to Add Screen Record on iPhone for Professional Use
If you want high-quality recordings for social media or tutorials:
Record in Landscape Mode
Better for YouTube and TikTok horizontal videos.
Turn On Do Not Disturb
Prevents notifications during recording.
Settings → Focus → Do Not Disturb.
Enable High Resolution
Some apps let you choose HD/4K after recording.
Use Editing Apps
Improve your recordings using:
- CapCut
- iMovie
- VN Video Editor
InShot
Frequently Asked Questions (FAQ)
1. Is screen recording available on all iPhones?
Yes, from iPhone 6s and later running iOS 11+.
2. Why can’t I see the screen recording icon?
You have not added it to Control Center.
Follow steps in How to Add Screen Record on iPhone above.
3. Does screen recording capture calls or WhatsApp audio?
Some calls may not record sound due to privacy laws.